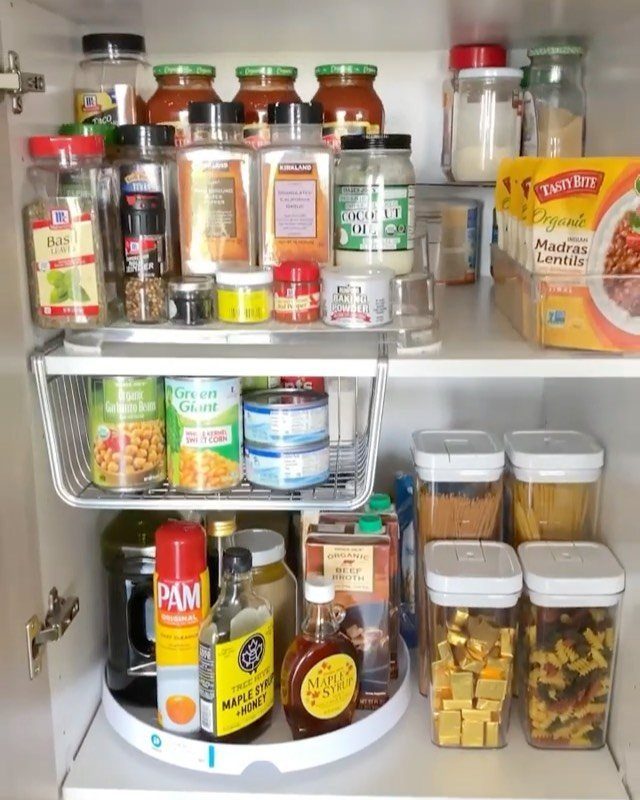
A pantry that runs floor to ceiling fits more than a short cabinet does, and a pullout brings the back within reach without kneeling.
How you organize depends on whether you have wall height to build up or cabinet depth that hides things in back.
Clear jars show you what needs to go on the list before you buy a duplicate, wire racks on the door add capacity without claiming shelf space, and rotating older stock forward cuts down on expired cans shoved behind new ones.
1. Snack and Baking Sections
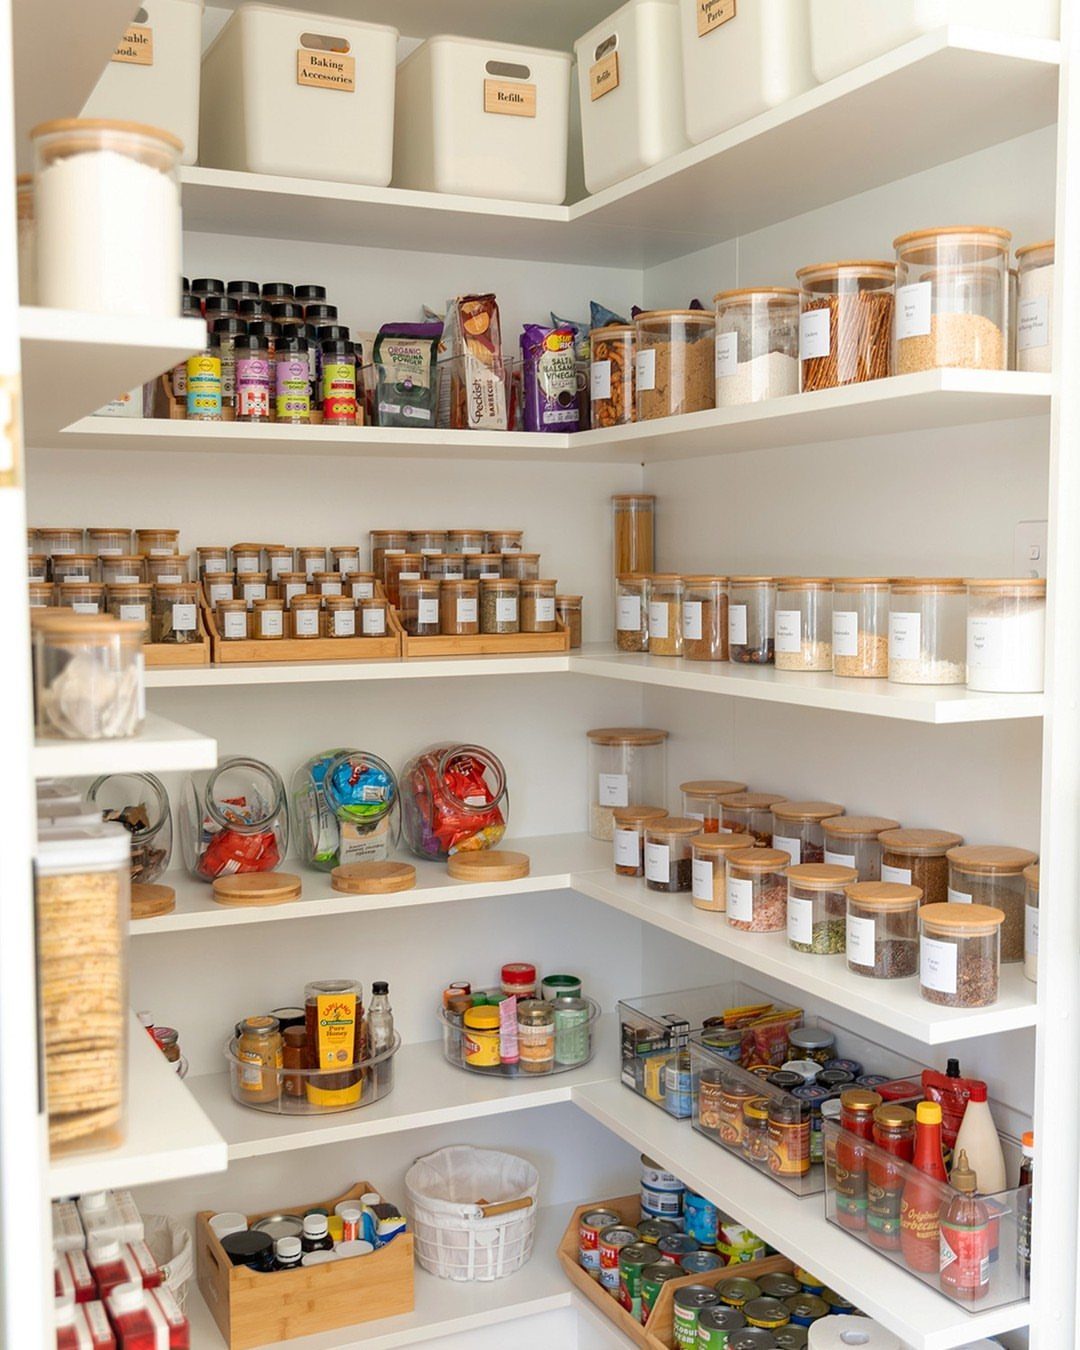
Group what gets used together. Baking ingredients on one shelf, breakfast foods on another, snacks in a third zone.
You stop digging through 3 bags to find the pretzels. You know where to start and where to put things back, which matters when you share the space with people who do not organize it the same way you would.
Label the sections if that helps your household stick to the plan.
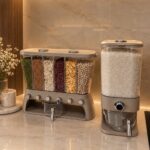
2. Clear Containers
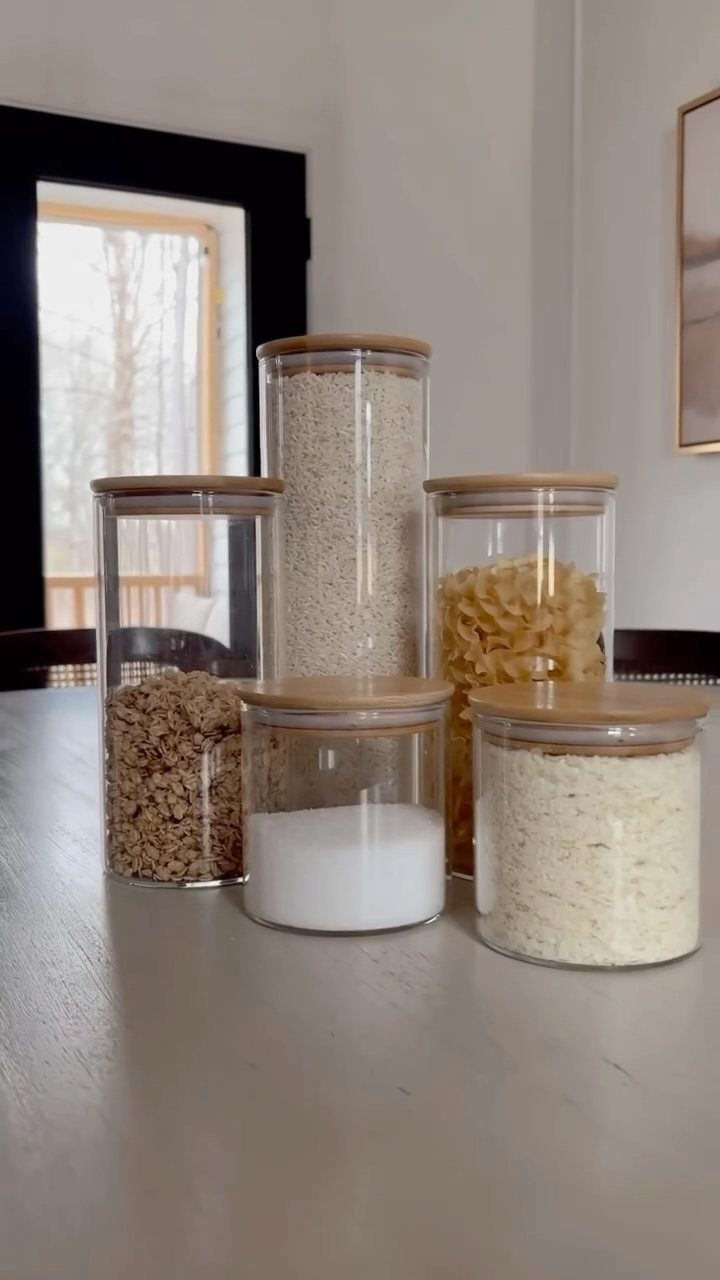
Dry goods go into glass or acrylic jars so you see what you have left without opening anything.
It saves you from buying a duplicate of something already in there, and it tells you at a glance when something needs to go on the list. Square jars fit tighter on the shelf than round ones do.
Decant staples you go through quickly. Things you rarely open can stay in their original packaging.
3. Baskets and Bins
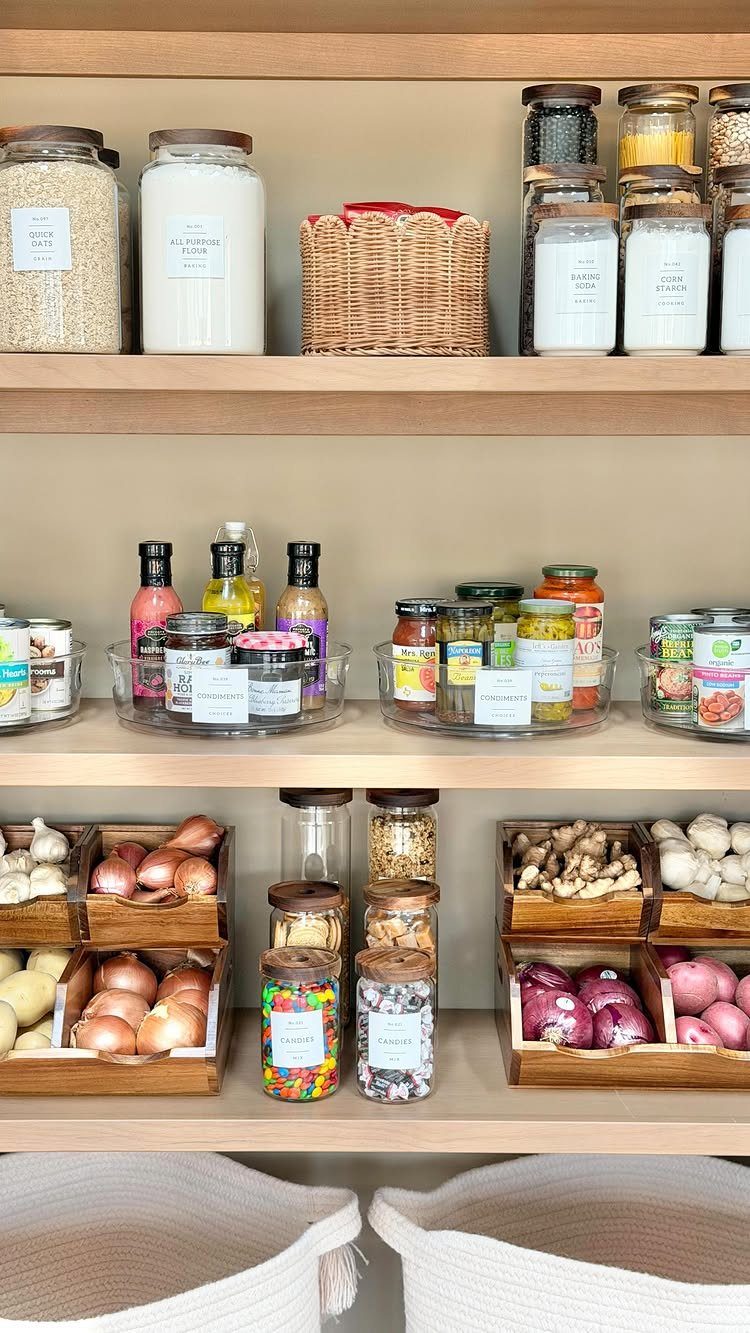
Bins corral loose packets, snack bars, seasoning pouches and small bottles that would otherwise slide around. Baskets hold produce that does not need refrigeration.
Pick containers that fit your shelf depth. A deep bin on a shallow shelf leaves half of it hanging over the edge, and a narrow bin on a deep shelf wastes the space behind it.
Wicker and wood look better than plastic if the pantry stays visible from the kitchen.
4. Lazy Susans

A turntable brings the back row forward without moving anything else. Spin it and grab what you need instead of pulling 3 bottles out to reach the fourth.
It works in corner cabinets and on deep shelves where your hand does not reach all the way to the wall. The second tier doubles what fits without claiming more counter.
Use it for bottles and jars that are roughly the same height so nothing tips when the platform spins.
5. Floor-to-Ceiling Shelves
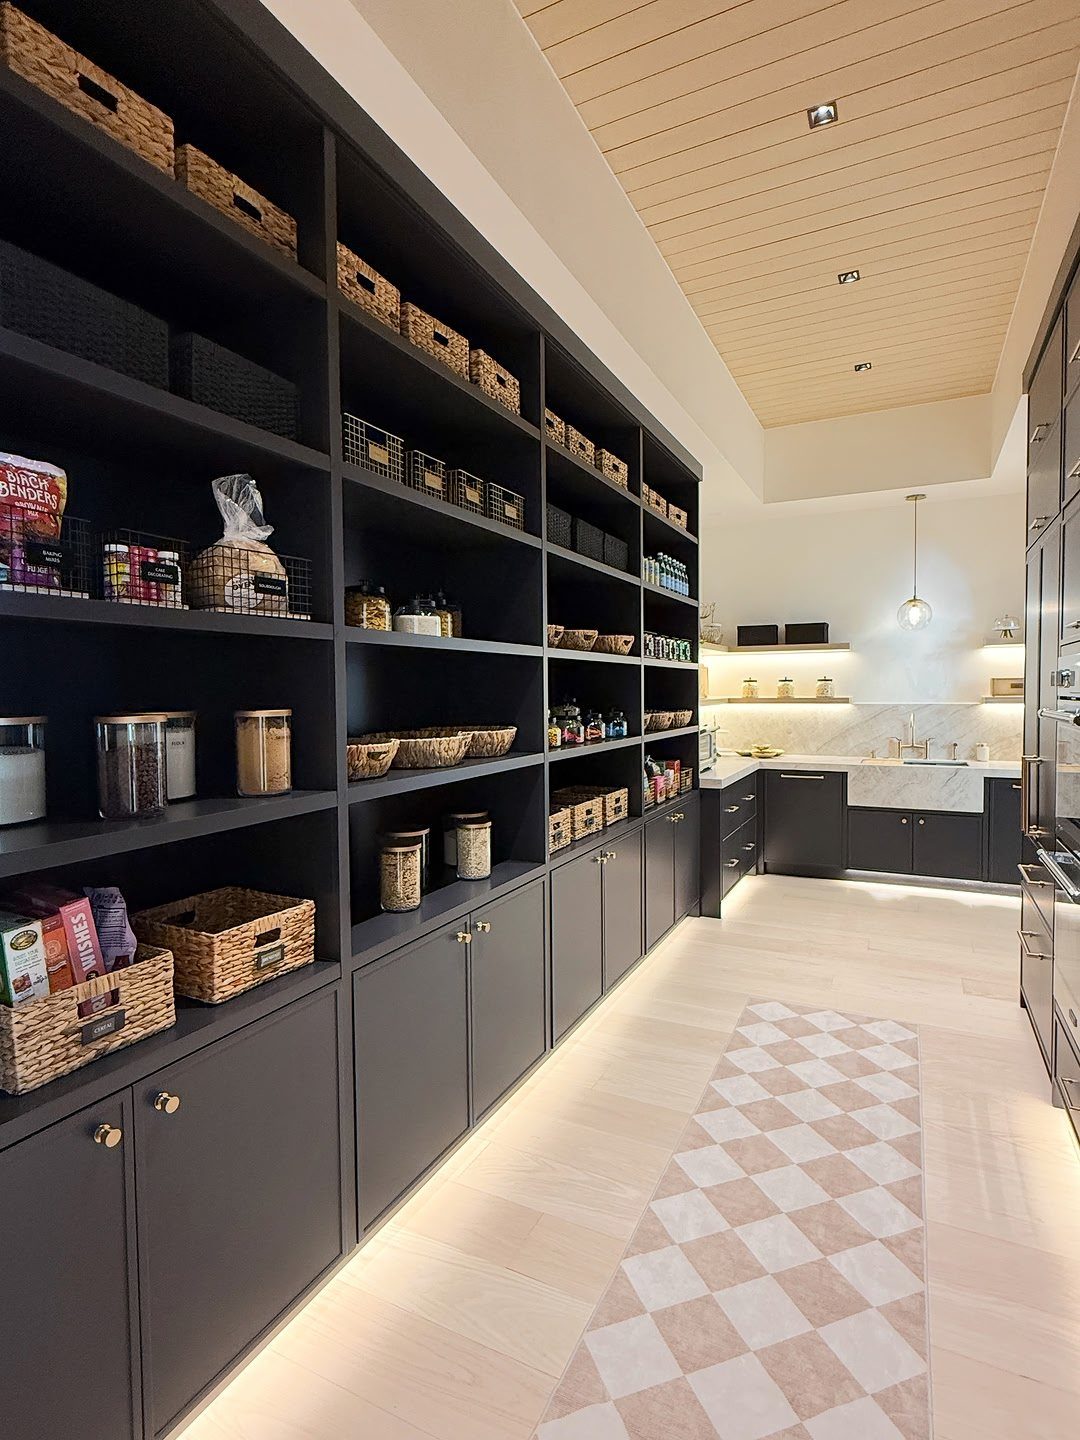
Install shelves from the floor all the way up to the ceiling in a narrow closet or along a kitchen wall. Vertical space is wasted less often than deep space, and it holds more than you think.
The middle height is where your hand lands first, so that is where the pasta and rice go.
The top shelf holds what you only reach for twice a year. Anything heavy sits low enough that you lift it from waist height, not overhead.
A step stool lives in or near the pantry if the top shelves see regular use.
6. Sliding Shelves

Install pullout shelves in a base cabinet or closet so the back becomes as easy to reach as the front. You slide the shelf toward you instead of kneeling and digging.
Full-extension slides let the shelf come all the way out. Cheaper slides stop short and leave a few inches stuck in the back, which defeats the point.
Measure the cabinet opening before you order. The shelf needs to clear the door frame and any hardware mounted inside.
7. Over-the-Door Storage

Hang a wire rack or fabric pocket organizer on the inside of the door and fill it with spices, packets, or anything that comes in a small jar or bottle.
The door swings open and closed anyway, so the rack adds capacity without taking shelf space. It keeps small things visible and within arm’s reach instead of stacked behind each other on a narrow shelf.
Choose a rack narrow enough that it clears the shelves when the door closes. Most models need a few inches of clearance behind the door.
8. Tiered Shelf Risers
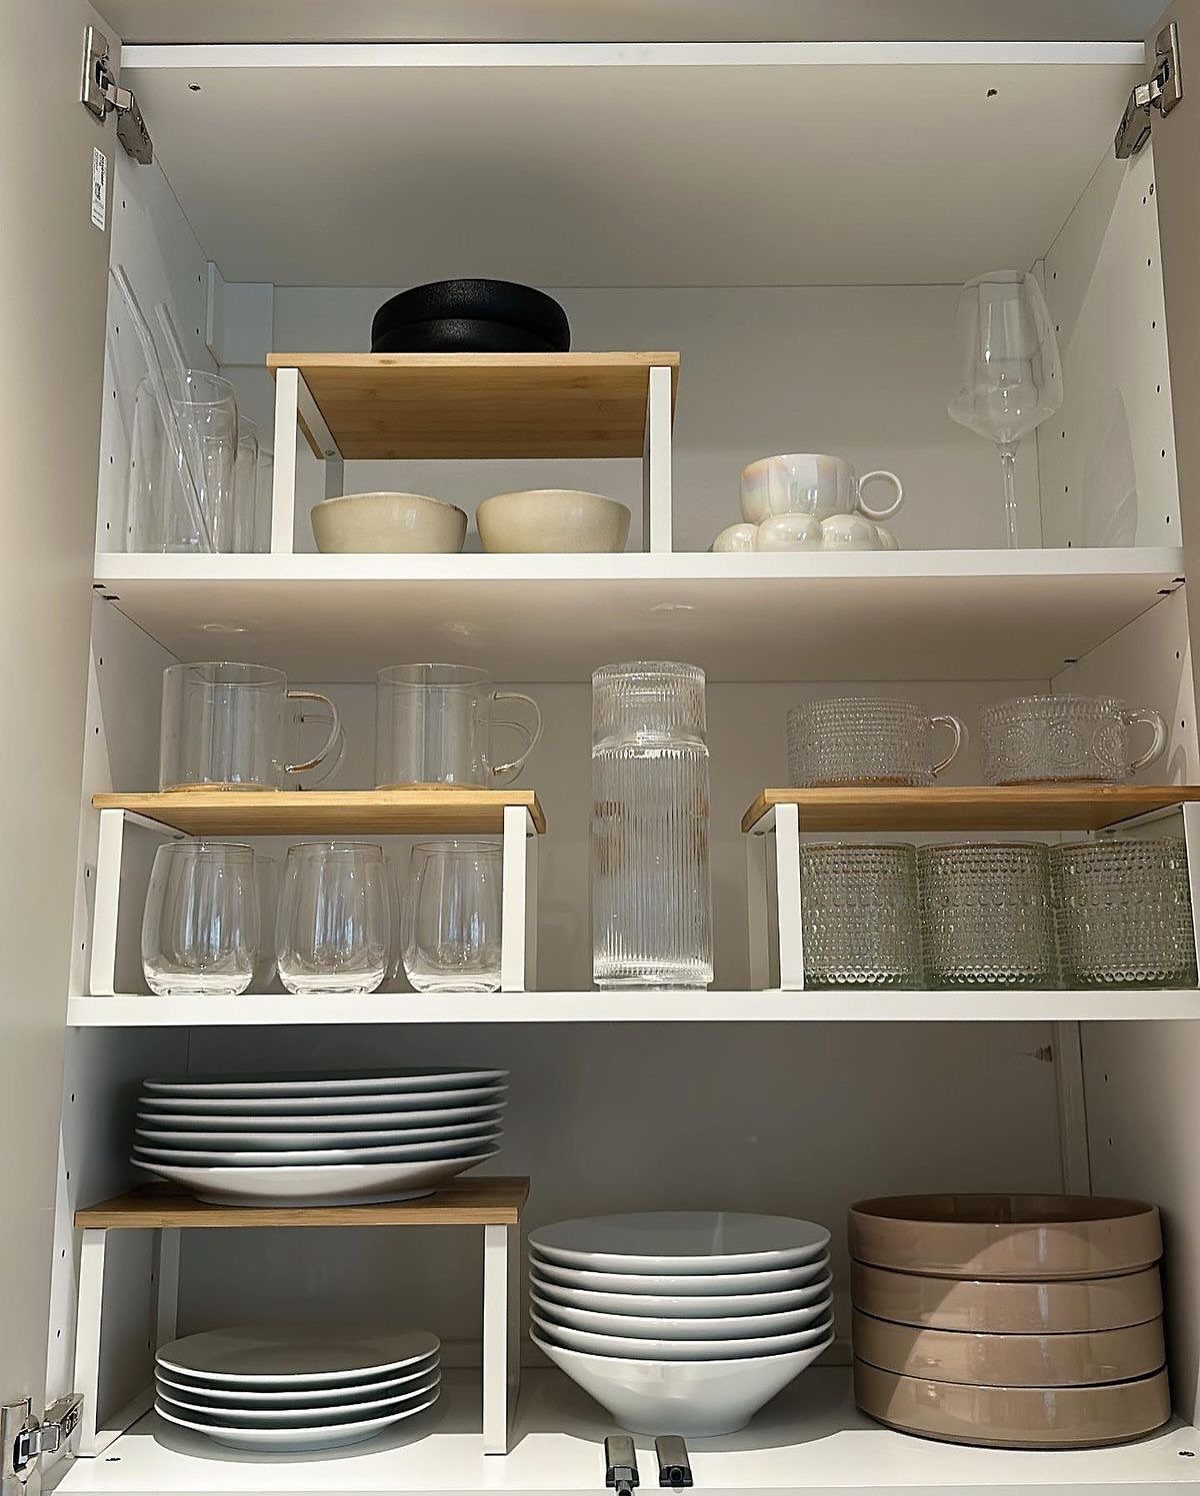
Set a stepped riser on the shelf so cans and jars in the back row sit higher than the ones in front. You see every label without moving anything aside.
Pick a riser height that matches what you store. A shorter step works for spice jars; a taller step suits cans and cereal boxes.
9. Matching Products Side by Side

Line up duplicates in a single row rather than scattering them across different shelves. 3 cans of tomatoes become easy to count, and you know at a glance when stock runs low.
It speeds up restocking and prevents the surprise of finding a fourth can tucked behind something unrelated.
The habit also shows you when you have bought more of something than the space can hold, which is useful before the next grocery run.
10. Keep Nothing Loose
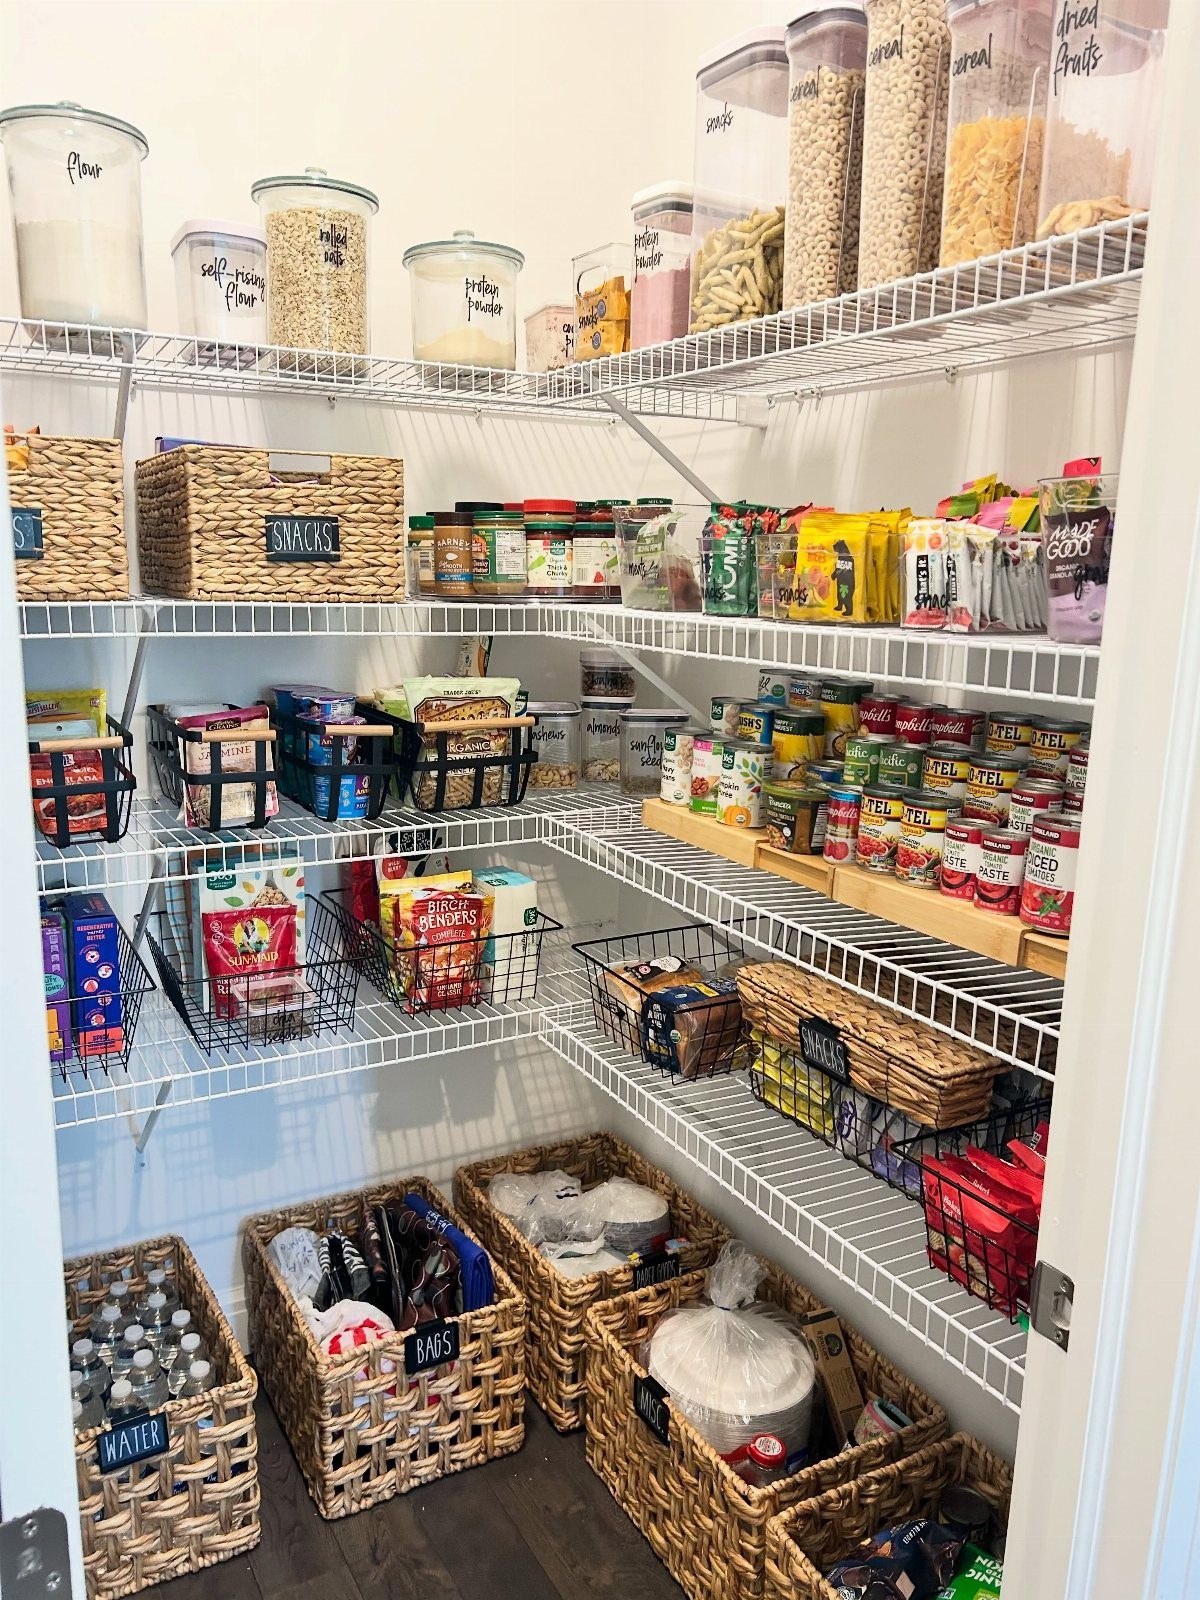
Put every item into a bin, basket, or jar rather than setting loose bags and boxes directly on the floor. Loose items slide around, collect dust underneath, and turn the bottom of the pantry into a pile.
Bins contain the mess and lift everything off the floor so you can sweep under them. A narrow floor means fewer trips over forgotten potatoes or onions that rolled into the corner.
11. Divide Bakeware
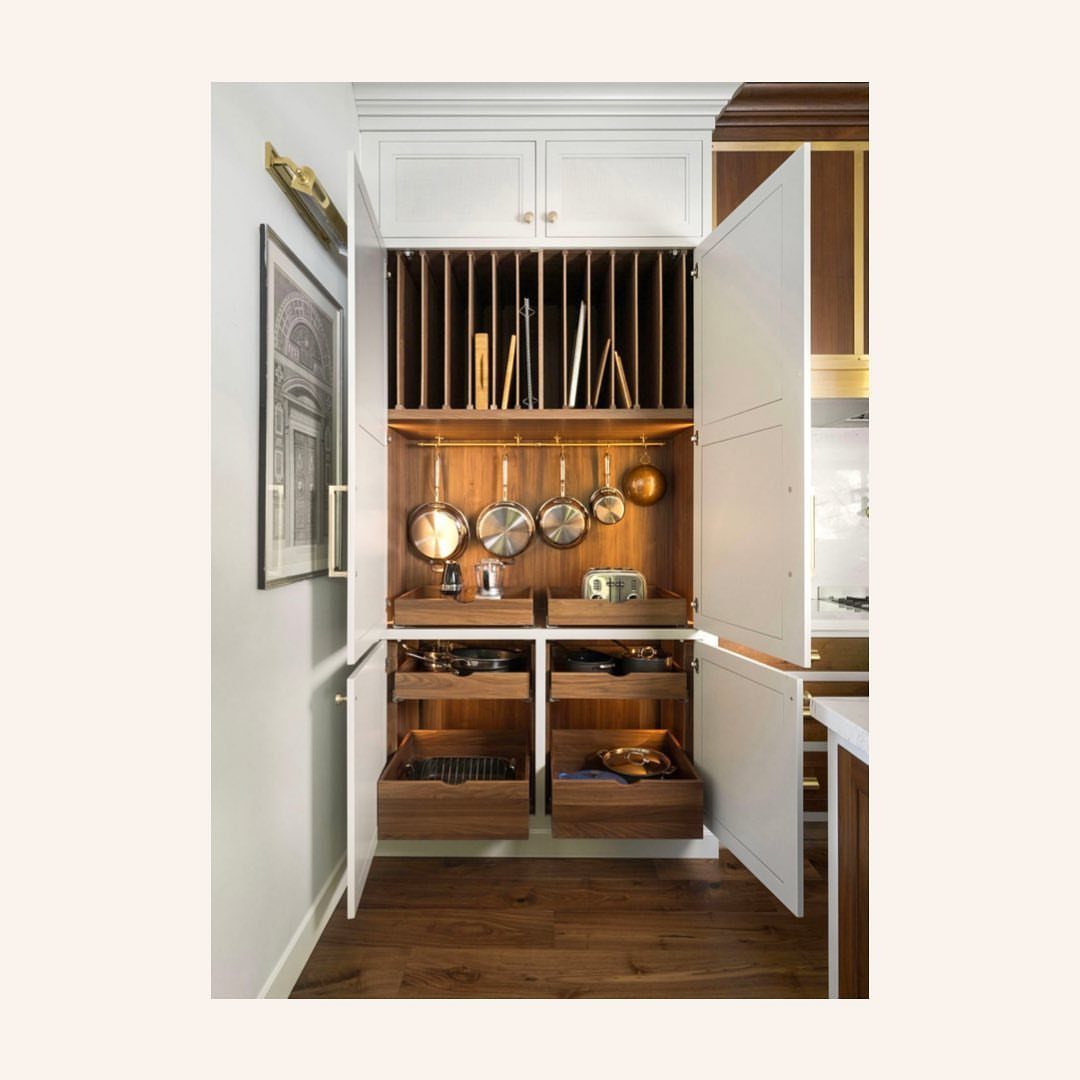
Add vertical dividers inside a cabinet or on a deep shelf so each sheet pan, cutting board, or cooling rack stands upright in its own slot.
Stacking them flat turns the bottom piece into something you have to unload half the cabinet to reach. Vertical storage lets you pull one out without disturbing the rest, and it fits more in the same footprint because nothing overlaps.
Install dividers that match your shelf depth. Adjustable ones move as your collection changes.
12. Proper Food Storage
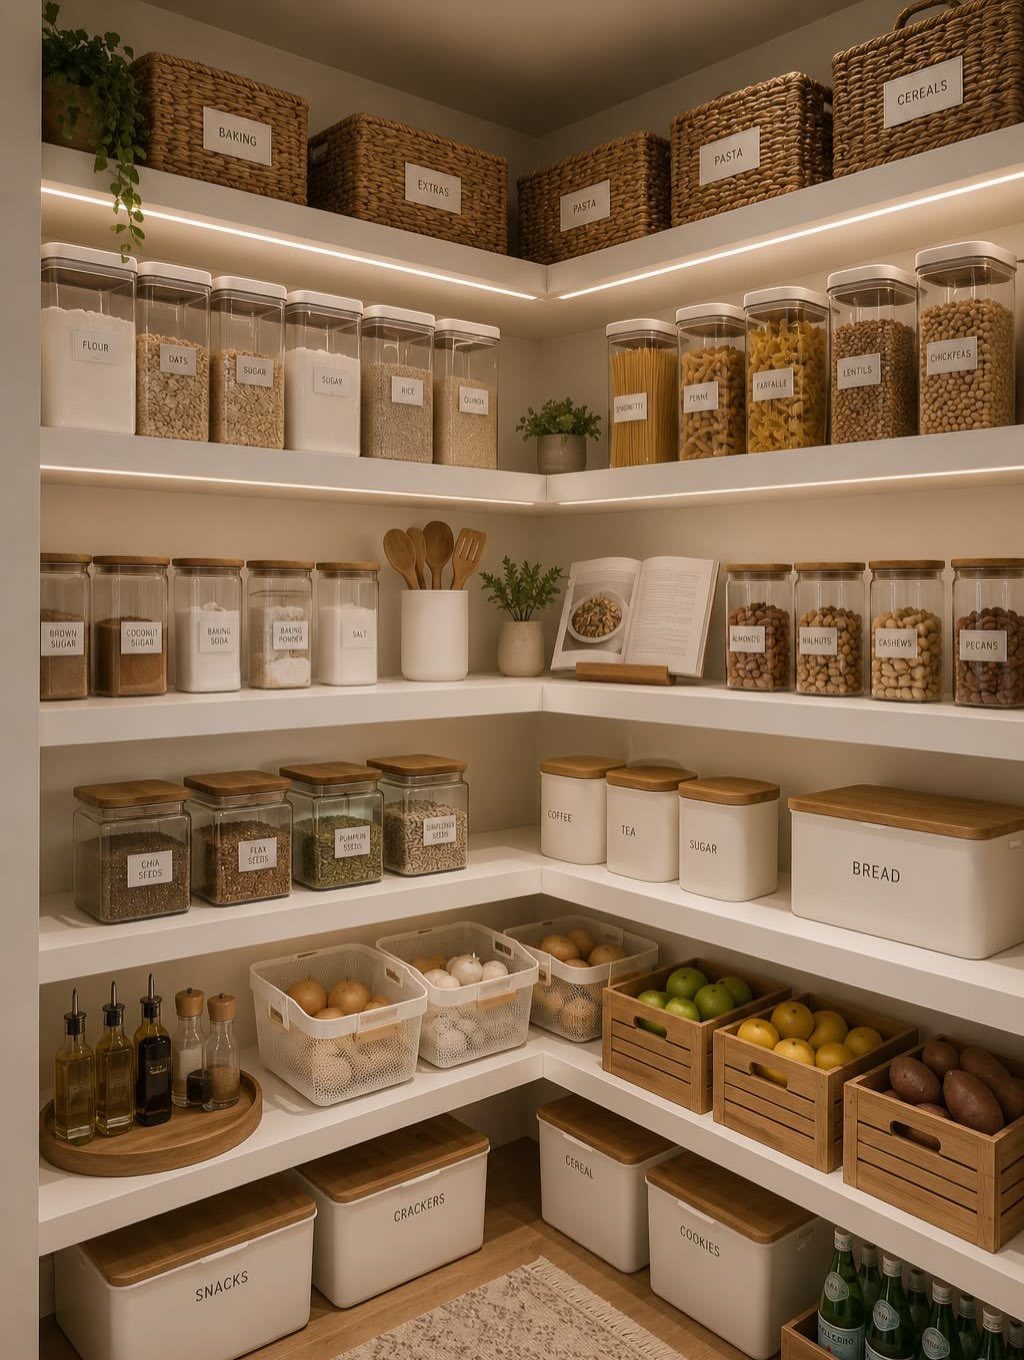
Match the container to what is inside it. Bread goes in a breathable bag or bin so it does not turn soggy.
Flour and sugar stay sealed so bugs do not get in. Onions and potatoes need airflow and darkness, so they belong in a basket rather than a closed jar.
The right storage keeps food fresh longer and cuts down on waste. A jar that worked for pasta will not work for crackers, and a sealed bin that suits rice will ruin produce.
13. Pantry Food in One Place

Store pantry food in the pantry instead of splitting it across kitchen drawers, cabinets under the sink, and a closet down the hall. Hunting through 3 rooms to find the rice wastes time you do not get back.
A single location means you know where to check before you add something to the list, and you know where it goes when you unpack groceries. The system only works if everyone in the house knows where that location is.
14. Decant Some Foods

Transfer flour, sugar, rice, and pasta from their bags into glass jars or clear bins. The originals take up more shelf space than they need to.
Specialty flours or grains you use twice a year can stay in the bag; you are not saving yourself any real hassle by pouring those into jars.
15. Use Flat Containers
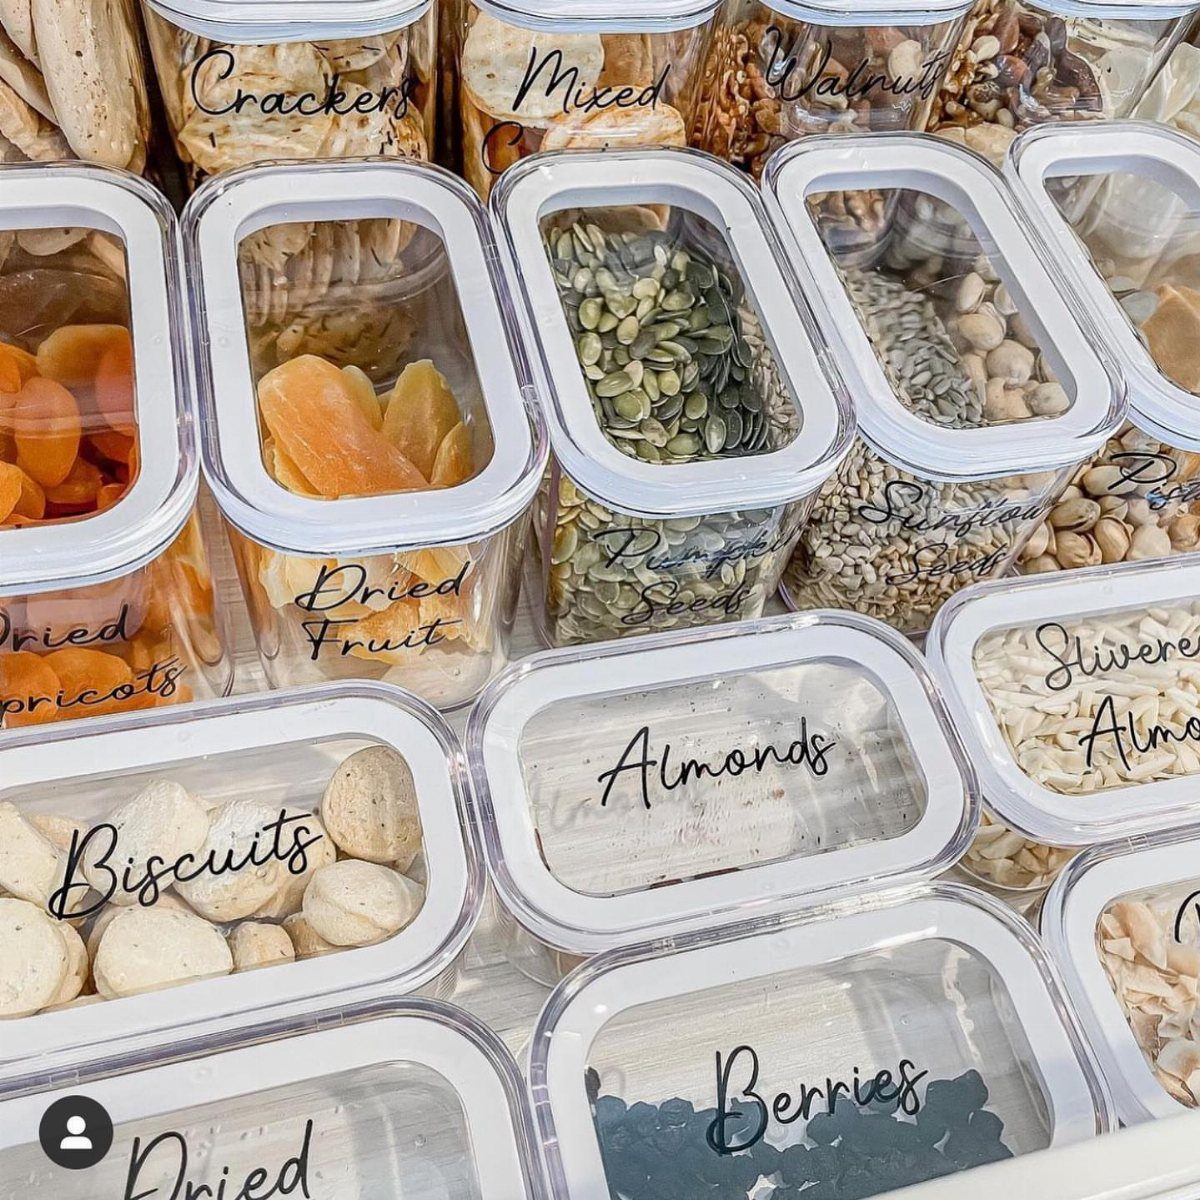
Flat containers stack without wasting the air between shelves. A tall jar of crackers leaves empty air above it; a short, wide bin uses that height for a second layer.
Measure your shelf spacing before you buy storage. A container that is too tall for the gap forces you to leave a shelf empty, and one that is too short leaves vertical space you cannot fill.
Flat works best for dry snacks, nuts, and anything sold in a bag you can flatten as you pour.
16. Repurpose Crates

Old wooden crates hold root vegetables, onions, or bagged snacks on lower shelves where a basket would sit anyway. The slats let air through, which matters for produce that rots faster in a sealed container.
You can find crates at thrift stores, flea markets, or salvage yards for less than new storage bins cost. Sand them down if the wood is rough enough to snag bags.
Stack them only if the wood is thick enough to hold weight without bowing.
17. Narrow Pull-Out Pantry
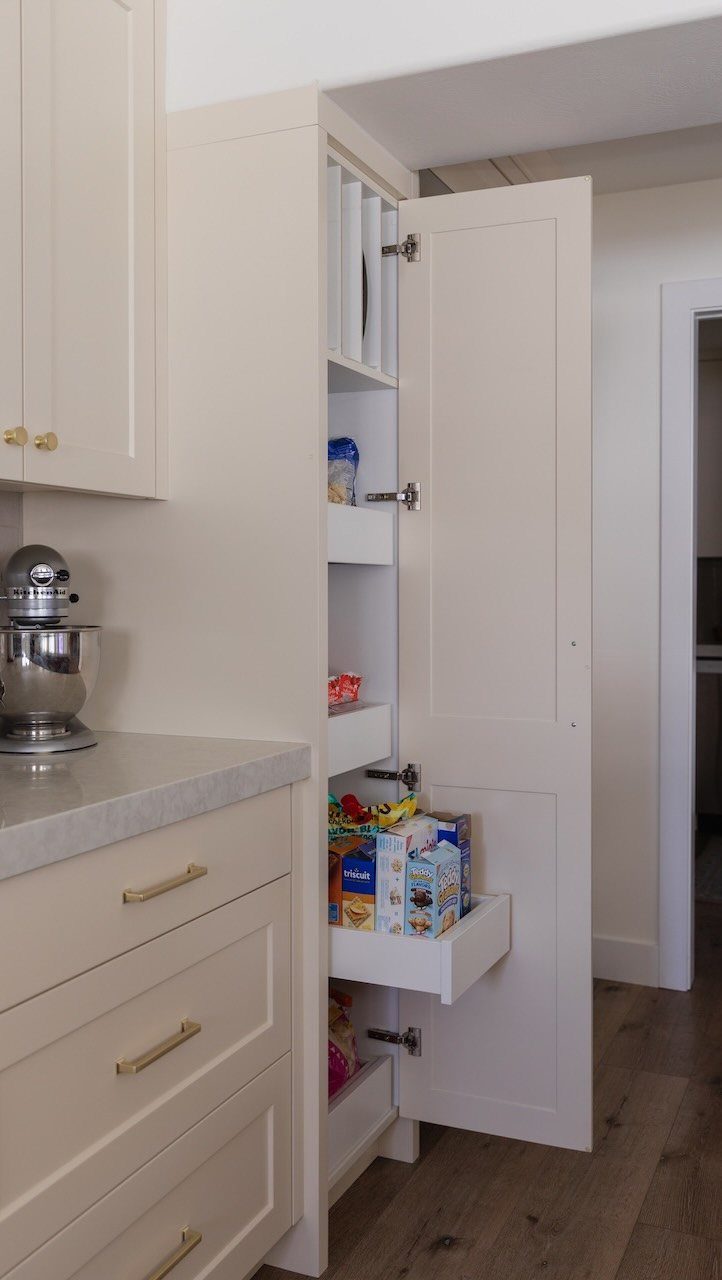
A tall cabinet with a pullout drawer fits between the fridge and the wall or at the end of a counter run. It holds cereal boxes, cracker sleeves, and snack bags in a footprint narrower than most base cabinets.
The drawer slides out so you reach everything without kneeling. Fixed shelves inside the cabinet hold overflow or things you reach for less often.
Most units need a few inches of width, and the door needs clearance to swing open.
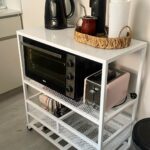
18. Rolling Pantry Cart
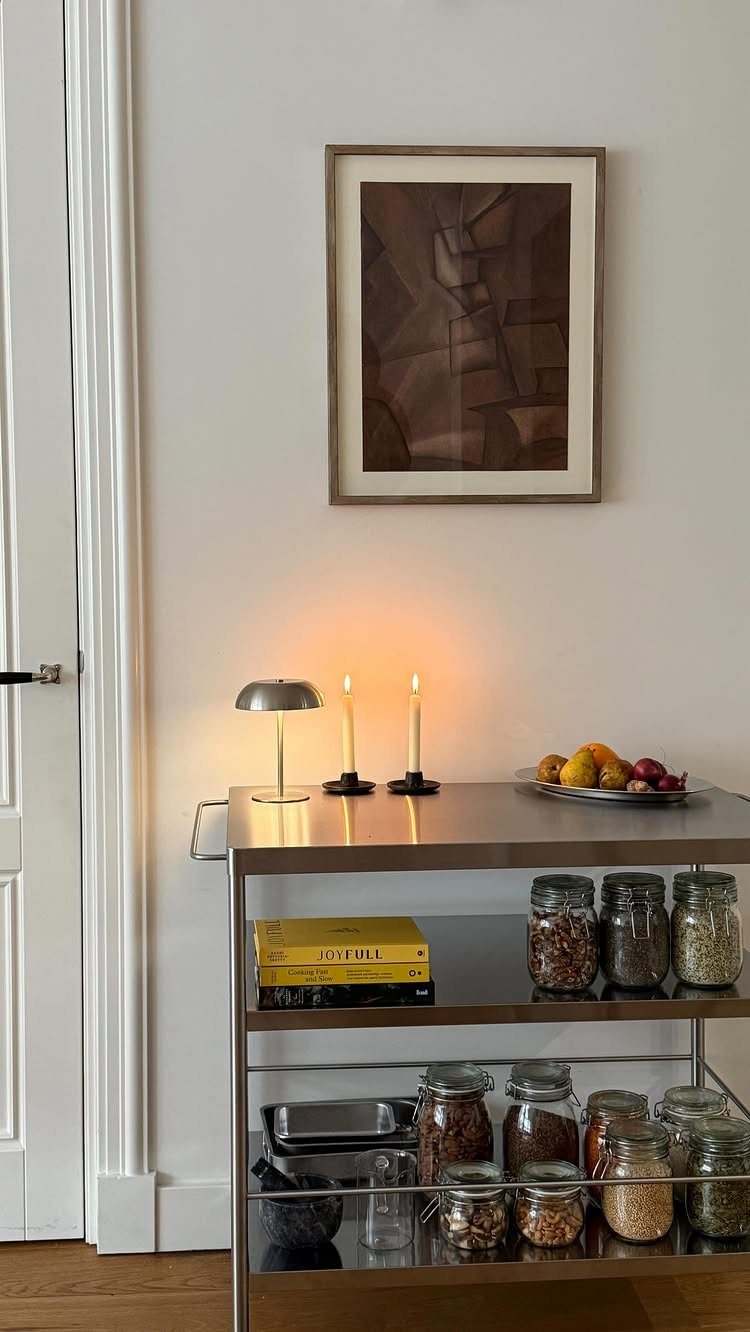
A cart on casters adds two or three shelves wherever you have floor space. Roll it next to the counter when you cook, then back against the wall when you need the aisle clear.
It works in kitchens with no pantry closet and in rentals where you cannot install shelves. The top holds jars and small appliances; the lower shelves fit canned goods and boxed staples.
Choose a cart narrow enough to fit the space without blocking traffic. Metal carts last longer than plastic ones and hold more weight per shelf.
19. Wall-Mounted Pantry Bins
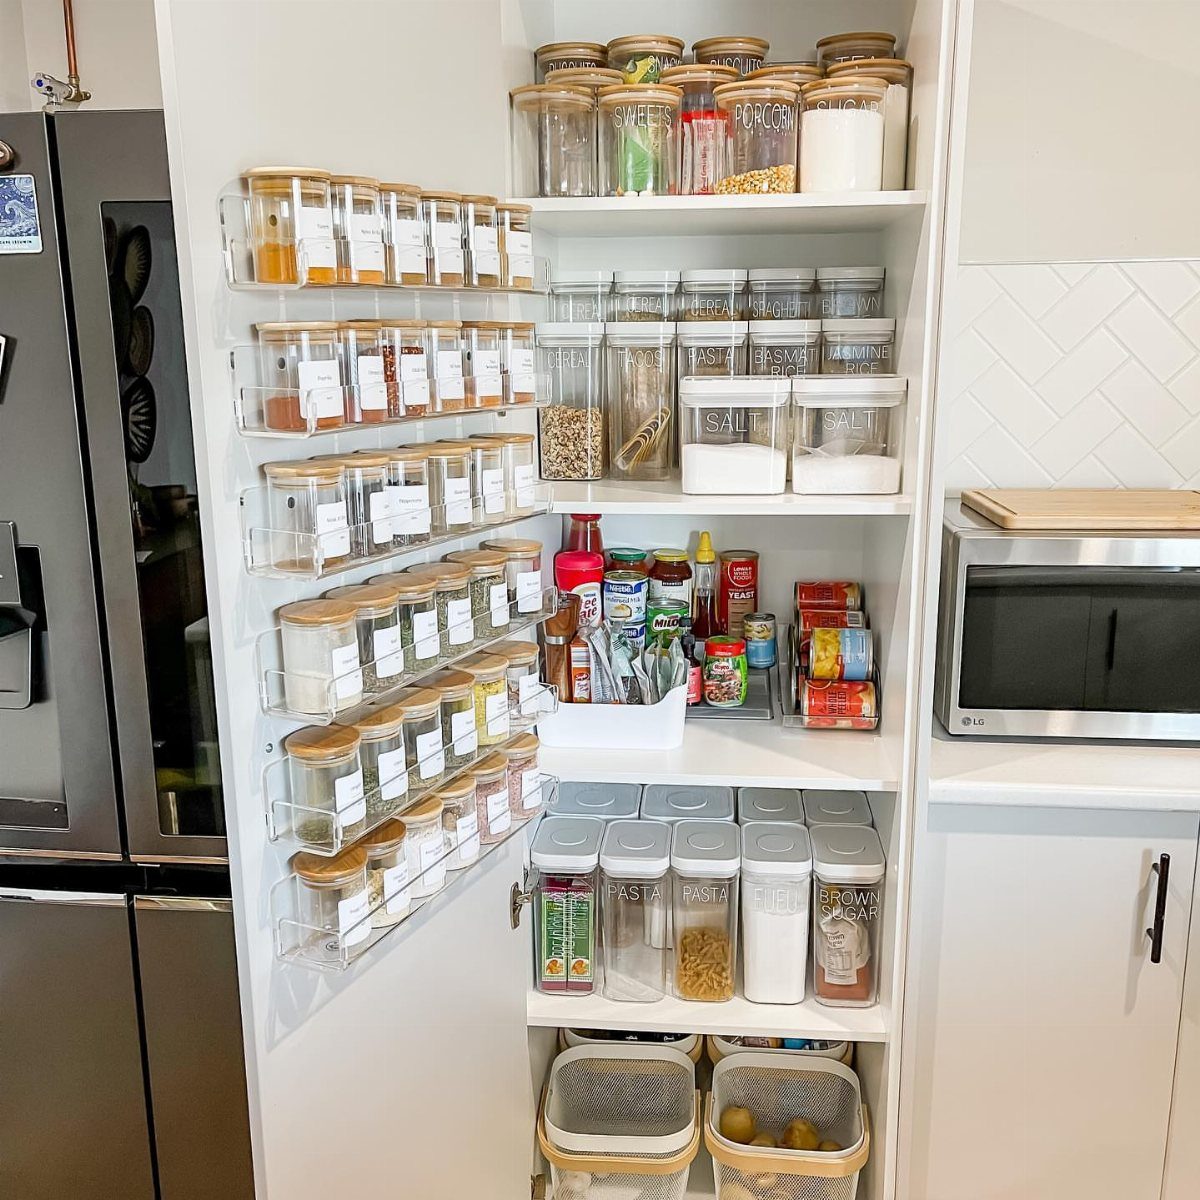
Mount clear bins to the pantry wall and fill them with spices, bouillon cubes, or small packets that would otherwise get lost on a shelf.
The bins hang at eye level so you spot what’s there without digging, and the shelf space below stays open for taller items.
Acrylic mounts with screws or adhesive strips depending on whether you own or rent. Measure the wall width before you buy so the bins fit without crowding the door swing.
Label the front if you store things that look alike from a distance.
20. Narrow Shelf Pantry

A tall freestanding shelf with rails sits against an empty stretch of wall and holds spices, oils, vinegars, and cutting boards in a footprint narrower than a base cabinet.
The rails keep bottles from sliding off when you pull something out.
It fits beside the fridge, at the end of a counter, or in any gap too narrow for standard cabinetry. You move it if you change the layout, which matters in a rental.
Pick a finish that works with the rest of the kitchen. Metal lasts longer than wood in humid climates.
21. Floating Pantry Shelves

Install two or three floating shelves on an empty pantry wall and fill them with jars, canned goods, and bagged snacks. The open format keeps everything visible, and you can adjust shelf height to match what you store.
A riser on one shelf lets you stack cans or jars without hiding the back row. Brackets need to hit wall studs if the shelves carry more than a few pounds.
A closet pantry keeps the shelves behind a door. Open shelves in the kitchen collect dust faster than cabinets do.
22. Tiered Pull-Out Drawers

3 stacked drawers slide out from inside a cabinet and hold dry goods in clear containers. Each drawer pulls forward independently, so you reach what is inside without lifting anything off the top.
The bamboo frame fits standard cabinet widths and installs on the existing shelf pins. Measure the interior height before you order so the unit clears the cabinet door when it closes.
This setup works when you already have the containers and need a way to organize them without buying bins for every shelf.
23. Pull-Out Cabinet Shelves
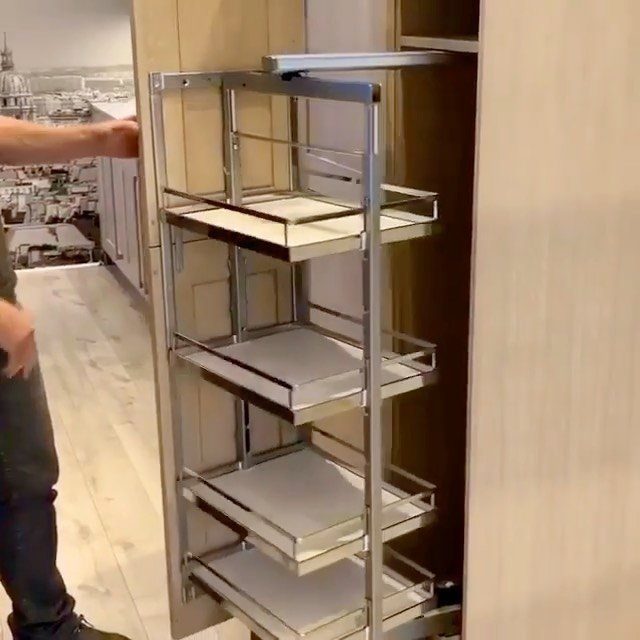
A metal rack slides out from a cabinet on full-extension rails. You pull the whole unit forward and grab what you need from any tier without kneeling or reaching past the first row.
The rack mounts to the cabinet floor and uses the same footprint as a fixed shelf, but it brings the back forward instead of making you dig for it.
Installation takes an hour if you have a drill and basic hardware.
Deep cabinets suit this because the back section goes unused when your arm does not reach that far.
24. Use Pantry Corners

An L-shaped pantry runs shelves along 2 walls and adds a countertop in the corner for small appliances or extra workspace. The layout uses corner space that a single row of shelves would leave empty.
Lower cabinets hold bulk items and anything too heavy to lift from above shoulder height. Upper shelves stay shallow so you reach the back without a step stool.
You want enough wall length on each side to give clearance between the shelves and the counter.
Plan Before Buying Storage
Measure shelf height, depth, and width before you order bins or jars. A container that does not fit the gap between shelves leaves space you cannot use, and one that extends past the shelf edge blocks the door from closing.
Check what you already store and how much of it you go through in a month.
If you buy flour once in a long while, the bag it comes in takes less room than a jar for it. If you go through it regularly, the jar makes sense.
Walk through a normal week and note what gets pulled out most often, what stays untouched, and what ends up on the floor because it does not have a spot.
That tells you where your reach lands first and what the system needs to support.
Shop for groceries, then organize. You see what actually needs to fit and where the gaps are.
Rotate Older Stock Forward
New cans go behind the old ones so the oldest moves to the front of the row.
You use what has been there longest before it expires, and you do not find an old can pushed to the back after you just bought a fresh one.
Check dates when you restock. Anything close to expiring moves to the front or onto a separate shelf where it gets used first.
The same rule applies to boxed goods, jars, and anything else with a date. A monthly check catches what needs to go before it turns into waste.
Maintain the System
Pick a system simple enough that you follow it when you are tired or in a hurry.
Bins with labels work if you and everyone else in the house will read the labels and put things back. If that does not happen, the system fails.
Set aside 5 minutes each week to pull forward what got shoved to the back, toss empty boxes, and move duplicates into the same row. A quick reset keeps the pantry from sliding back into the pile it was before.
Leave a few inches of empty space on each shelf. Groceries change, habits shift, and a system packed to capacity has nowhere to absorb a sale on pasta or a new breakfast cereal without forcing you to reorganize from scratch.
Frequently Asked Questions
How can I easily organize my small pantry cupboard?
Group items by how you use them, put dry goods into clear jars so you see what is left, and add bins to hold loose packets.
Store what you reach for most often at eye level and keep bulk overflow somewhere else if the pantry cannot hold it all.
Build in a few inches of breathing room on every shelf so the next grocery run does not mean pulling everything out and starting over.
What are the pantry zones?
Breakfast foods stay together, baking supplies claim their own shelf, snacks live in a separate section.
Grouping by use means you know where to find the pretzels without digging through 3 bags, and you know where things belong when you put groceries away.
What is the best way to organize my pantry?
Store all pantry food in one location instead of splitting it across different rooms, group items by category, and use clear containers for staples you go through quickly.
Measure the shelves first so the bins you buy actually fit, and choose an approach you will stick with on a Tuesday night when you are exhausted.
What are some clever storage solutions for a tiny kitchen?
Pullout shelves bring the back row within reach, a wire rack mounted inside the door holds spices and small jars, and tiered risers lift the cans in back so you can see past the front line.
A rolling cart on casters gives you shelves wherever floor space allows and tucks away when you want the aisle back.
Why does small pantry organization matter?
You stop buying duplicates of things already sitting in there, you find ingredients the first time you reach for them, and the kitchen stays calmer when the pantry is not chaos.
Seeing what you have at a glance cuts down on waste and saves time every day.
What are the best small pantry organization tips to start with?
Pull everything out, toss what is expired, and sort items into groups before you buy any bins.
Add vertical storage from floor to ceiling because that space usually goes unused, and put what you reach for most often at the height where your hand lands first.
How do I keep my pantry organized long-term?
Choose an approach simple enough to follow when you are tired, and spend 5 minutes each week moving forward whatever slid to the back.
Reserve a few inches of open shelf on every level so incoming groceries have a place to land without requiring a full reshuffling.